Hi.,
I'm sudalaimani
Web content management (WCM) is essential to run a website successfully. To manage web content, publishers should organize content in line with the requirements of the audience.
Do you have a YouTube channel and wondering how you can increase videos views on YouTube?
If your answer is yes, read on to learn how to promote YouTube videos.
The fact is, It doesn’t matter how much time you put into creating your videos; if you are not marketing & promoting your videos, your work will never be seen by the majority of your target audience. It’s like throwing a big party without letting anyone knows.
And this is the time to change it and become one of the YouTuber who is seen by everyone.
Why should you believe me?
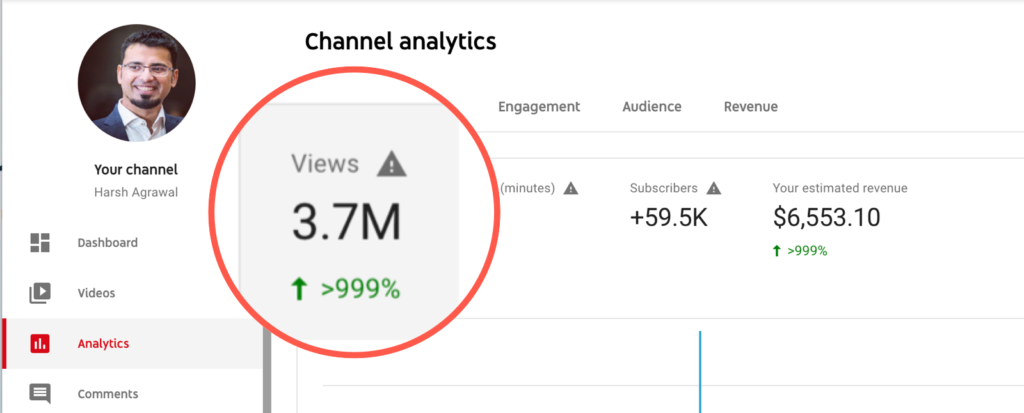
Because I have applied these techniques to promote my YouTube videos and received more than 3 million views so far.
YouTube video promotion is an art that anyone can learn… with a little discipline.
In this guide, I have shared strategies and techniques that you can follow to market & promote your YouTube videos.
These tips are tested, proven, and work for videos from almost every niche. Think of this post as a checklist that you need to follow once you are done producing your videos.
Best ways to promote YouTube videos:
Video Title (Optimize it for more clicks)
Video Tags – Utilize the 500 characters limit
Use a good thumbnail
Use Intro and outro video for Branding
Promote videos on Social media channels
Start a blog for YouTube channel
Use YouTube Playlist
Use Call to action
Interview Influencers In Your Niche
YouTube’s Creator Academy
Share your latest video with your YouTube community
So without further delay, let’s learn the art of YouTube video promotion!
How To Promote A YouTube Video or Channel & Get More Views
I have covered all major YouTube promotion techniques in the sub-topics below.
Note: In upcoming posts in our YouTube promotion series, I will explain these sub-topics in detail. If you are a professional YouTuber or are planning to become one, you should subscribe to our blog updates or download our iOS/Android app to stay updated.
1. Video Title (Optimize it for more clicks)
The titles of your videos are a major deciding factor between them being widely seen & shared across the internet, or only getting a small number of views.
It’s a good idea to do proper YouTube keyword research to find what people are searching for and then crafting a great title around that.
Here are some tips for writing great video titles on YouTube:
Keep them short and to the point.
Add the current year if you can (Ex: Best Tips for 2018).
Make it attention-grabbing.
Include keywords at the beginning of the title (where possible).
Use “Power Words” (Ex: Best, Awesome, Incredible).
Use emotional triggers words (Ex: Sensual, Lonely, Passionate, Censored).
Capitalize your headline title. Use this tool to help you.
2. Video Tags – Utilize the 500 characters limit
One of the biggest mistakes that hinder the growth of your YouTube video’s organic promotion is incorrect tag usage.
Tagging in YouTube works differently than it does in a blog post. If you’ve never paid attention to YouTube tags, now’s a good time to start. You can even go back and edit all of your old tags.
Here are some rules for using YouTube video tags:
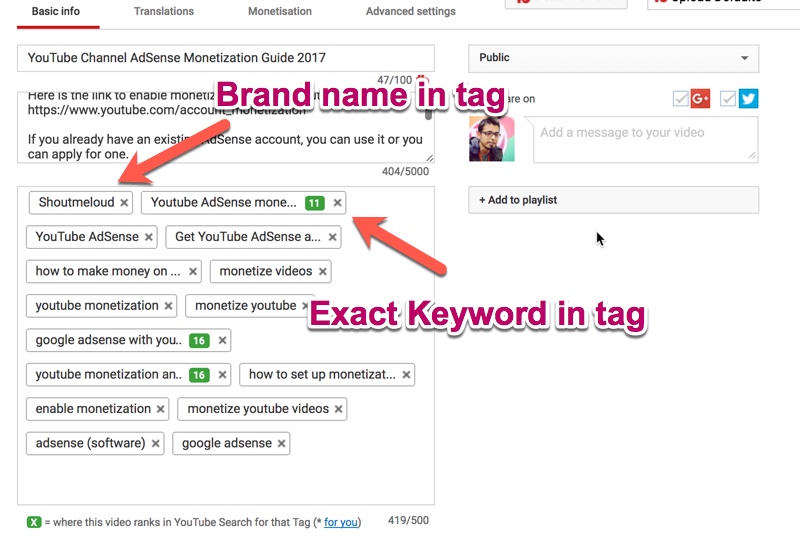
Use a unique branded tag so that your videos are shown in related videos. Ex: Use your brand name in all videos. (See below screenshot.)
Use your main keywords as the video tag.
Use a variation of your keyword as a tag (take help of the YouTube auto-suggest feature).
Find the tags used by high ranking videos & use those in your video. You can use the TubeBuddy Chrome extension to help you find tags used by others.
Do remember, YouTube video tags are an important factor for the organic ranking of videos.
3. Use A Custom Thumbnail on YouTube
Verified YouTube accounts can take advantage of the custom thumbnail feature. A good video thumbnail helps you stand out in the related video and suggested video section.
Here are some tips for thumbnails:
Have a resolution of 1280 x 720 (with a minimum width of 640 pixels).
Upload in either .JPG, .GIF, .BMP, or .PNG.
Keep it under 2MB.
Try to use a 16:9 aspect ratio as it’s the most used in YouTube players and previews.
I don’t want to confuse you with these technicalities, but it’s important for you to know this so that you can craft a thumbnail that works well on desktops as well as mobile devices.
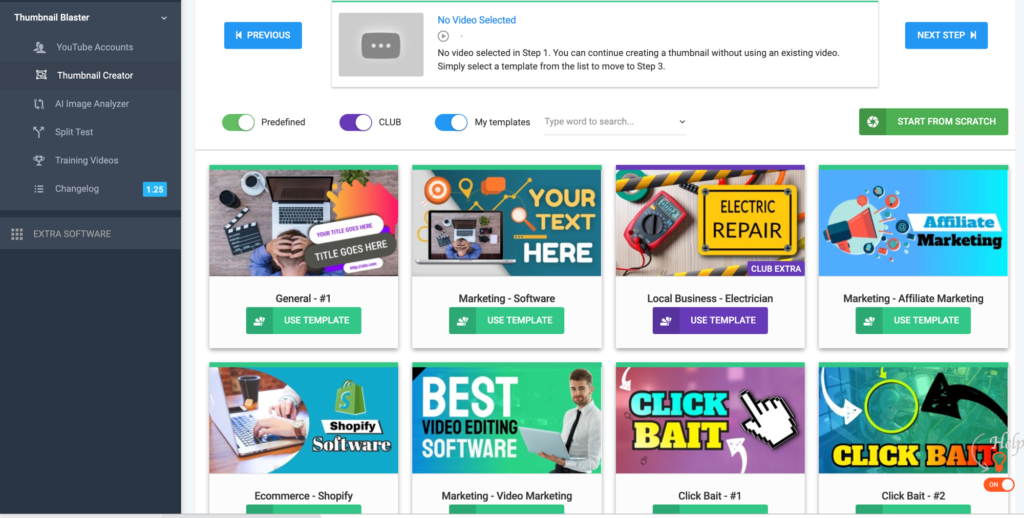
You can use Thumbmaker to design a thumbnail for YouTube videos in minutes.
Make sure, you follow the latest standard of YouTube thumbnail:
Have a resolution of 1280×720 (with a minimum width of 640 pixels).
Less than 2 MB in size
The aspect ratio of 16:9 works best
Use your image in the thumbnail to envoke emotions
Watch this video to learn more about creating clickable thumbnails:
4. Use Intro and outro video for Branding
There are a few branding things that you should do from now on which will ensure every video stands out. One of those things is using a branded intro and outro.
YouTube intro: A 3-5 second clip that runs at the beginning to showcase your brand.
YouTube outro: This runs at the end and can be as simple as showing related videos for your channel or asking users to like & subscribe to videos.
Getting a YouTube intro & outro video is easy, and you can create them yourself using Camtasia or you can hire someone from Fiverr.
Below video outro is an example of quality that I got from Fiverr (
Take a look at this video and see the outro I got created for me from someone on Fiverr: (Browse to 3.53 seconds for video outro)
If you don’t have a channel logo yet, do get that designed, too.
If you are a video blogger, you should have some social media properties for your YouTube channel. This gives you an opportunity to create a community outside of YouTube & direct traffic from other popular social media/social networking channels. These
These are the sites to promote your YouTube videos:
I typically share each video at least 10-15 times within eight months after publishing. Also, use hashtags when sharing so that others can easily discover them.
6. Start A Blog For Your YouTube Channel
If you are a full-time YouTuber, you shouldn’t miss out on creating a blog for your YouTube videos. These days, it’s pretty easy to embed YouTube videos onto a blog & you can start a blog.
Bonus Tip: You can also buy a domain name & redirect it to your YouTube channel. This way when someone asks you “How can I find you on YouTube?”, simply share the domain name. Use this coupon from GoDaddy to buy a domain name for $2.
7. Utilize YouTube Playlist Or Add Video To An Existing Playlist
A YouTube playlist is a great way to get more views on your existing videos. When you are done uploading a new video, add it to a playlist (either one you create or an existing one).
If you are creating a new playlist, follow these steps:
Give a meaningful name to the playlist & have a keyword in the title of that playlist.
Add a detailed description of the playlist and put your keyword(s) in there.
Group similar videos into one playlist.
A single video can be listed in more than one playlist.
YouTube playlists also appear in search results. By doing this, further discovery of your videos is increased.
Watch this below video to learn about creating a Playlist on YouTube:
8. Use Calls To Action
People on social media sites need to be told about the actions you want them to take.
At the end of the video, or even somewhere in middle, ask viewers to like & subscribe to your channel. At the same time, you can ask them to share the video with others who might benefit from it.
Most of the prominent YouTubers use “Call to action” technique to amplify their video reach with existing subscribers. If you have never done this before, start doing it from your next video onward.
You will be amazed to discover that by simply asking your existing subscribers, the number of shares increases to a great extent.
9. Interview Influencers In Your Niche
This one is not a direct YouTube video promotion technique that will boost your channel, and it fits perfectly in the overall strategy of your channel promotion.
Interviewing an influencer gives you an opportunity to get access to an already thriving community in your niche. Not only you will grab the attention of others who follow that particular influencer, you will also get noticed by the industry as a whole.
You can find the top influencers in your niche & you can interview them using Google Hangouts, Zoom or Skype. For Skype, you can use a tool like Ecamm call recorder. The free version of Zoom allows video recording of up to 45 minutes, which is what I use these days.
10. YouTube’s Creator Academy
One mistake most of the growing YouTube marketers make is they just focus on publishing more videos & stop learning.
YouTube is one of the fastest changing platforms, and it’s important for you to learn about all of the existing and emerging tips and tricks.
You can use Creator Academy by YouTube to learn some pro tips for making the most out of your YouTube videos (and your channel as a whole). When I started learning here, I was surprised to learn so many growth hacks & tricks which I would have otherwise missed.
11. Post to your YouTube community (Bonus)
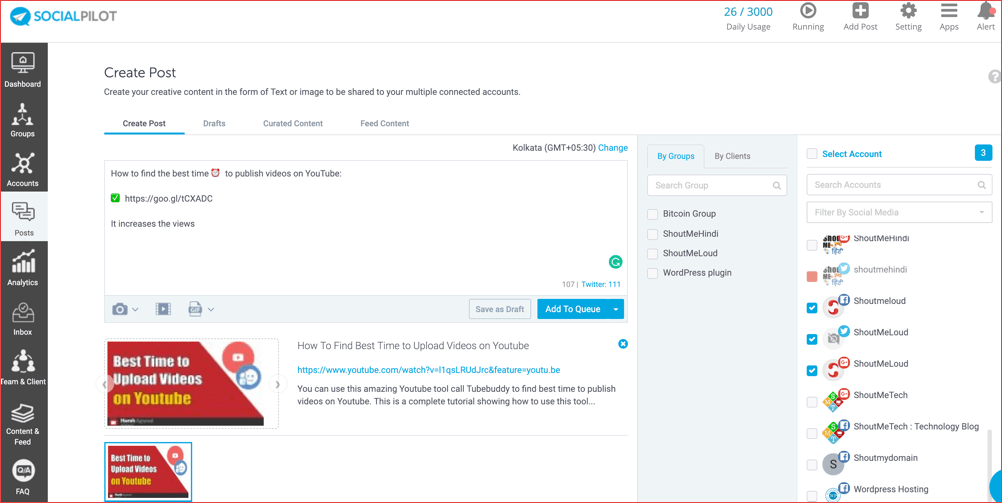
YouTube is silently building a social network and you can promote a video on YouTube by using the post to community feature. Simply click on the + icon on YouTube web or mobile app, and click “Create post“.
Now, type the message and link to the video that you want to promote. You can add .gif or images or even run a poll to make it more engaging. Your community can like and also comment on your post which is a great signal for higher engagement. This is yet, one of the untapped free video promotion techniques.
Now, your turn…
Promote Your YouTube Videos And Get More Views
Well, these are some simple promotion strategies & techniques that you can use from today onward for your YouTube videos.
These tricks and tips will surely help you get a lot more traffic, and ultimately, more YouTube subscribers.
Now it’s your turn to share how you are promoting videos on YouTube after you hit the ‘publish’ button. Let me hear about your promotion strategies! I’ll keep updating this post with all of the best suggestions from the comments section.
If you find any of the listed tips useful, share them with your YouTuber friends! And don’t forget to join me on YouTube!
Thank me ❤️ by sharing this article...
Tuesday, February 11, 2020
WI-FI hacks.., use for educational purpose only How to Hack WPA/WPA2 Wi-Fi With Kali linux., Written by sudalaimanis
Step : 1
Plugin your injection-capable wireless adapter, (Unless your native computer wireless card supports it). If you’re using Kali in VMware, then you might have to connect the card via the
icon in the device menu.
open your kali linux - terminal type iwconfig , you can see this line mode :Managed,
Disconnect from all wireless networks, open a Terminal, and type airmon-ng
This will list all of the wireless cards that support monitor (not injection) mode. If no cards are listed, try disconnecting and reconnecting the adapter (if you’re using one) and check that it supports monitor mode. If you’re not using an external adapter, and you still don’t see anything listed, then your card doesn’t support monitor mode, and you’ll have to purchase an external one (see the link in the requirements). You can see here that my card supports monitor mode and that it’s listed as wlan0. step : 2
Type airmon-ng start followed by the interface name of your wireless card. mine is wlan0, so my command would be: airmon-ng start wlan0
The “(monitor mode enabled)” message means that the card has successfully been put into monitor mode. Note the name of the new monitor interface this is important you not note this interface ,you can't doing anything , mon0 or wlan0mon ,
step :3 we will start scanning networks this using airodump-ng and this interface mon0 or wlan0mon,
Airodump will now list all of the wireless networks in your area, and a lot of useful information about them. Locate your network or the network that you have permission to penetration test. Once you’ve spotted your network on the ever-populating list, hit Ctrl + C on your keyboard to stop the process. Note the channel of your target network.
Replace [channel] with the channel of your target network. Paste the network BSSID where [bssid] is, and replace [monitor interface] with the name of your monitor-enabled interface, (mon0). The “–w” and file path command specifies a place where airodump will save any intercepted 4-way handshakes (necessary to crack the password). Here we saved it to the Desktop, but you can save it anywhere.
A complete command should look similar this:
airodump-ng -c 10 --bssid 00:14:BF:E0:E8:D5 -w /root/Desktop/ mon0 press enter
Airodump with now monitor only the target network, allowing us to capture more specific information about it. What we’re really doing now is waiting for a device to connect or reconnect to the network, forcing the router to send out the four-way handshake that we need to capture in order to crack the password.
Also, four files should show up on your desktop, this is where the handshake will be saved when captured, so don’t delete them!
But we’re not really going to wait for a device to connect, no, that’s not what impatient hackers do. We’re actually going to use another cool-tool that belongs to the aircrack suite called aireplay-ng, to speed up the process. Instead of waiting for a device to connect, hackers can use this tool to force a device to reconnect by sending deauthentication (deauth) packets to one of the networks devices, making it think that it has to reconnect with the network.Of course, in order for this tool to work, there has to be someone else connected to the network first, so watch the airodump-ng and wait for a client to show up. It might take a long time, or it might only take a second before the first one shows. If none show up after a lengthy wait, then the network might be empty right now, or you’re to far away from the network.
You can see in this picture, that a client has appeared on our network, allowing us to start the next step.
Leave airodump-ng running and open a second terminal. In this terminal, type this command: aireplay-ng –0 2 –a [router bssid] –c [client bssid] mon0The –0 is a short cut for the deauth mode and the 2 is the number of deauth packets to send. -a indicates the access point/router’s BSSID, replace [router bssid] with the BSSID of the target network, which in my case, is 00:14:BF:E0:E8:D5. -c indicates the client’s BSSID, the device we’re trying to deauth, noted in the previous picture. Replace the [client bssid] with the BSSID of the connected client, this will be listed under “STATION.” And of course, mon0 merely means the monitor interface, change it if yours is different.
My complete command looks like this: aireplay-ng –0 2 –a 00:14:BF:E0:E8:D5 –c 4C:EB:42:59:DE:31 mon0
step:4
Enter, you’ll see aireplay-ng send the packets. If you were close enough to the target client, and the deauthentication process works, this message will appear on the airodump screen (which you left open)
This means that the handshake has been captured, the password is in the hacker’s hands, in some form or another. You can close the aireplay-ng terminal and hit Ctrl + C on the airodump-ng terminal to stop monitoring the network, but don’t close it yet just incase you need some of the information later.
If you didn’t receive the “handshake message,” then something went wrong in the process of sending the packets. Unfortunately, a variety of things can go wrong. You might just be too far away, and all you need to do is move closer. The device you’re attempting to deauth might not be set to automatically reconnect, in which case you’ll either have to try another device, or leave airodump on indefinitely until someone or something connects to the network. If you’re very close to the network, you could try a WiFi spoofing tool like wifi-honey, to try to fool the device into thinking that you’re the router. However, keep in mind that this requires that you be significantly closer to the device than the router itself. So unless you happen to be in your victim’s house, this is not recommended.
Do note that, despite your best efforts, there are many WPA networks that simply can’t be cracked by these tools. The network could be empty, or the password could be 64 characters long, etc.
This concludes the external part of this tutorial. From now on, the process is entirely between your computer, and those four files on your Desktop. Actually, it’s the .cap one, that is important. Open a new Terminal, and type in this command: aircrack-ng -a2 -b [router bssid] -w [path to wordlist] /root/Desktop/*.cap
-a is the method aircrack will use to crack the handshake, 2=WPA method.
-b stands for bssid, replace [router bssid] with the BSSID of the target router, mine is 00:14:BF:E0:E8:D5.
-w stands for wordlist, replace [path to wordlist] with the path to a wordlist that you have downloaded. I have a wordlist called “wpa.txt” in the root folder.
/root/Desktop/*.cap is the path to the .cap file containing the password. The * means wild card in Linux, and since I’m assuming that there are no other .cap files on your Desktop, this should work fine the way it is.
Aircrack-ng will now launch into the process of cracking the password. However, it will only crack it if the password happens to be in the wordlist that you’ve selected. Sometimes, it’s not. If this is the case, you can try other wordlists. If you simply cannot find the password no matter how many wordlists you try, then it appears your penetration test has failed, and the network is at least safe from basic brute-force attacks.
Cracking the password might take a long time depending on the size of the wordlist. Mine went very quickly.
If the phrase is in the wordlist, then aircrack-ng will show it too you like this: